

Many people have asked me over the years, what I would do once I reach my final 195th country of the world and check off this incredible journey I spent the last 20 years to accomplish. “What’s next” have they asked me repeatedly. “Well, I will just do it again, just differently” would I simply reply. As you may have heard before, “traveling is all about the Journey, not about the destination”. And it was time to build a new style of travel to keep the journey as interesting as possible.
In This Article...
- 1 The Learning Curve
- 2 The Platform
- 3 The Conversion Plan
- 4 Stripping off the van and Insulating it
- 5 Installing Exterior Necessities
- 6 Installing the Van’s Floor
- 7 The Electrics
- 8 Building the Wall
- 9 Building the Ceiling
- 10 The Kitchen Cabinets
- 11 The Bed and bathroom
- 12 Final Result
- 13 Other Pictures of the Van Build
- 14 Pin to Pinterest
- 15 Support Ian with a TIP or Donation
Once I reached my final country visited in August 2021 and after the release of my memoir Globetrotter, I was ready to undertake my exploration of the world in a totally new way and in many different forms. One project that I had on my bucket list for years, was to explore the beauties of Europe in more detail, in every corner. Europe contains an infinite number of villages that deserve to be explored! In fact, out of all my world travels, I believe there is no other richer region in the world to explore than in Europe! And I am dying to reach all its “hard to reach” areas. For this, I would need a new means of transport than my usual backpacking style.
Vanlife made a lot of sense to undertake this project. Having my own wheels just made more sense to reach small areas of the map. I often rented cars here and there, to maximize my reach in those countries that require wheels, like in North America for example. One could argue that in Europe it is not needed, but in my opinion, this applies only if someone wants to reach the bigger cities, and not towns.
A van also meant that I could save precious night budgets in some of its more expensive areas, as Europe is definitely not cheapest place to travel to. So I went ahead and research how I could obtain a Camper van, DIY style, to reach my objectives.
The Learning Curve
Vanlife DIY vans gained a lot in popularity over the past years, especially during the pandemic, when people changed their travel styles. People literally buy cargo vans and convert them into a custom-built home adapted to their needs! From the ear of an engineer, that sounded like an amazing challenge! And so I went, researching about all areas that would need to be learned, for me to create my own little space on wheels. First, there were logistics of owning and registering a vehicle in Europe, which is much harder than I had previously imagined. Then I had to read and figure out how I would build and install everything, and that required pushing my skills in areas such as Mechanics, Carpentry, Architecture, Electrics, Plumbing, and Interior Design. A lot on the table, and it required a lot of self-motivation, but I believed it was a challenge I was willing to make.
It took me many months of hard research to understand exactly what I wanted, and how I would do it. I owe a great deal of knowledge to Youtube and other Vanlifers who have documented their build and that have pushed their vans to incredible levels of design. I inspired myself with a few bits here and there, and went ahead with my own design, following my needs. this article is my way to document my van build and bring back the kowledge to whoever would be insterested in such a build.
The Platform
For my particular situation, I didn’t want to have a full-time living van, one of those big Ford transit vans, or even less of a full motorhome that needs a special license to drive and can only go from campground to another campground. My primary objective was to have a platform where I would primarily have a nice easy to drive vehicle. When I drove, I wanted to be able to forget that it is a van, as if it was a normal car, and forget about what’s in the back, especially as Europe has tiny streets everywhere. So this eliminated any big van and prioritized having a small van that would have enough space to sleep, but also to cook, and store all items I would need for my future adventures. I don’t own that many items, as a minimalist traveler. After all, I spent the last 20 years living in a luggage (and the last 7 years living in a 10kg carry-on luggage).
After researching all models of mini-vans around, and after considering the Ford Transit Connect, the Nissan NV200, and the VW Caddy, I opted for the Fiat Doblo (also known as the Dodge Promaster City in North America).

My other priority was to have a stealth van, in which, no-one would be able to guess what is in the back. I had originally preferred to buy a Cargo van, but after noticing how many cargo vans get cracked open and robbed around Barcelona after an afternoon walk, I opted for a passenger version in which we would completely enclose the back with the most tinted windows we could find.
I found the perfect model in Germany, and after a lot of research, opted for a beautiful 2016 model, with many options I would need for extensive travel, such as Air conditioning and cruise control and a the most powerful engine avialable.

The Conversion Plan
Converting a van completely by yourself is surely no easy task. Especially when you don’t have a fixed address and location to get the work done quietly and with peace of mind. So the plan I made up was to purchase all the necessities from Amazon in Germany, and without even starting the conversion, start traveling, to accomplish the build on the way.
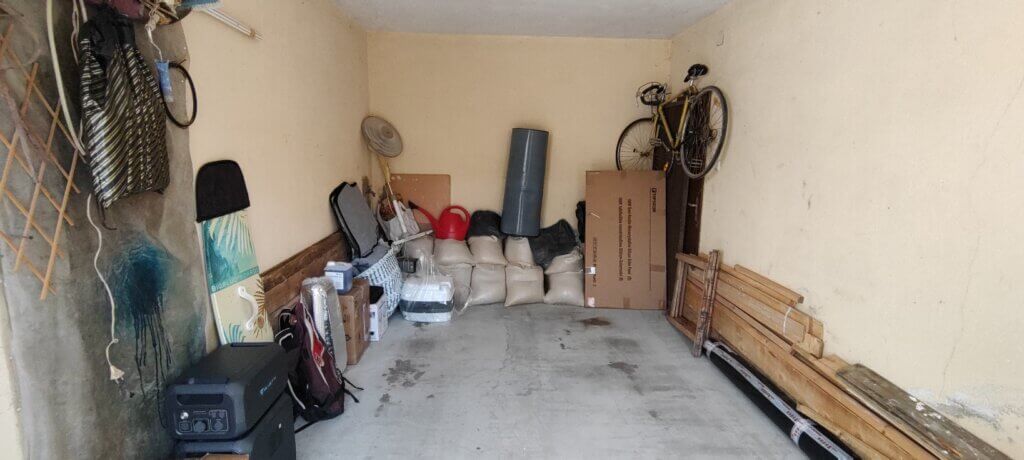
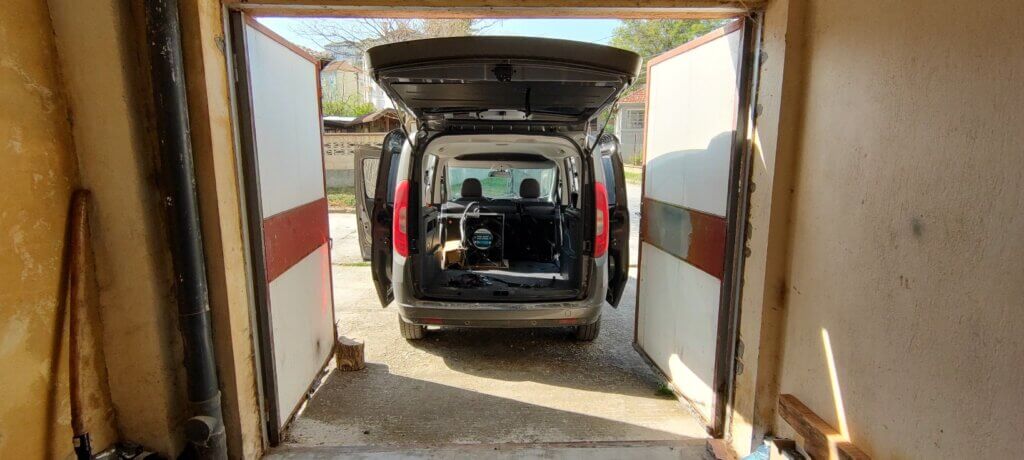
I needed to be in Turkey in June, so I had to find a reliable place where I could get all the focus and concentration necessary to build the van. So I rented an apartment with a Garage in Bulgaria and notified the host that I would be using the garage and working “around the clock” to get the build done, in the one month that I was there.
One month is a hell of a challenge to get everything done, but that was what I was presented with, and determined that I could get it done if I invested about 12 to 15 hours daily, 7 days a week. And so I went ahead with the project.
Stripping off the van and Insulating it
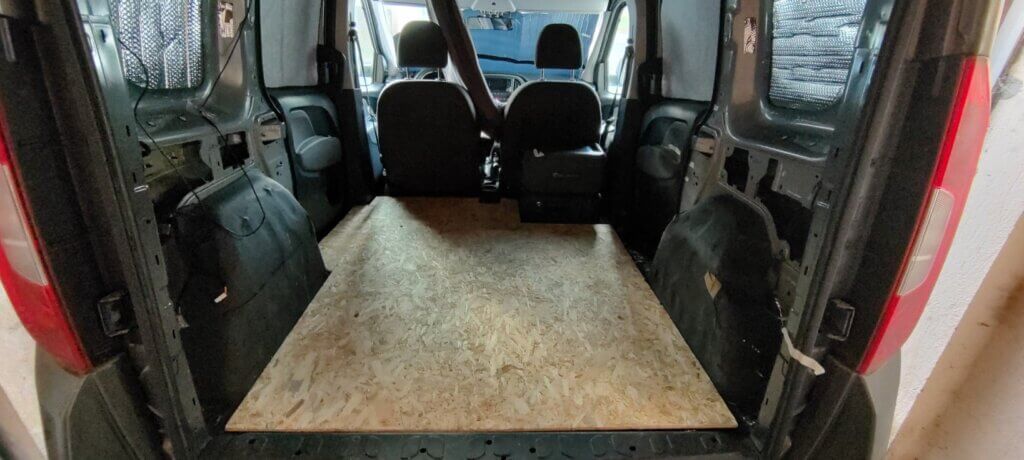
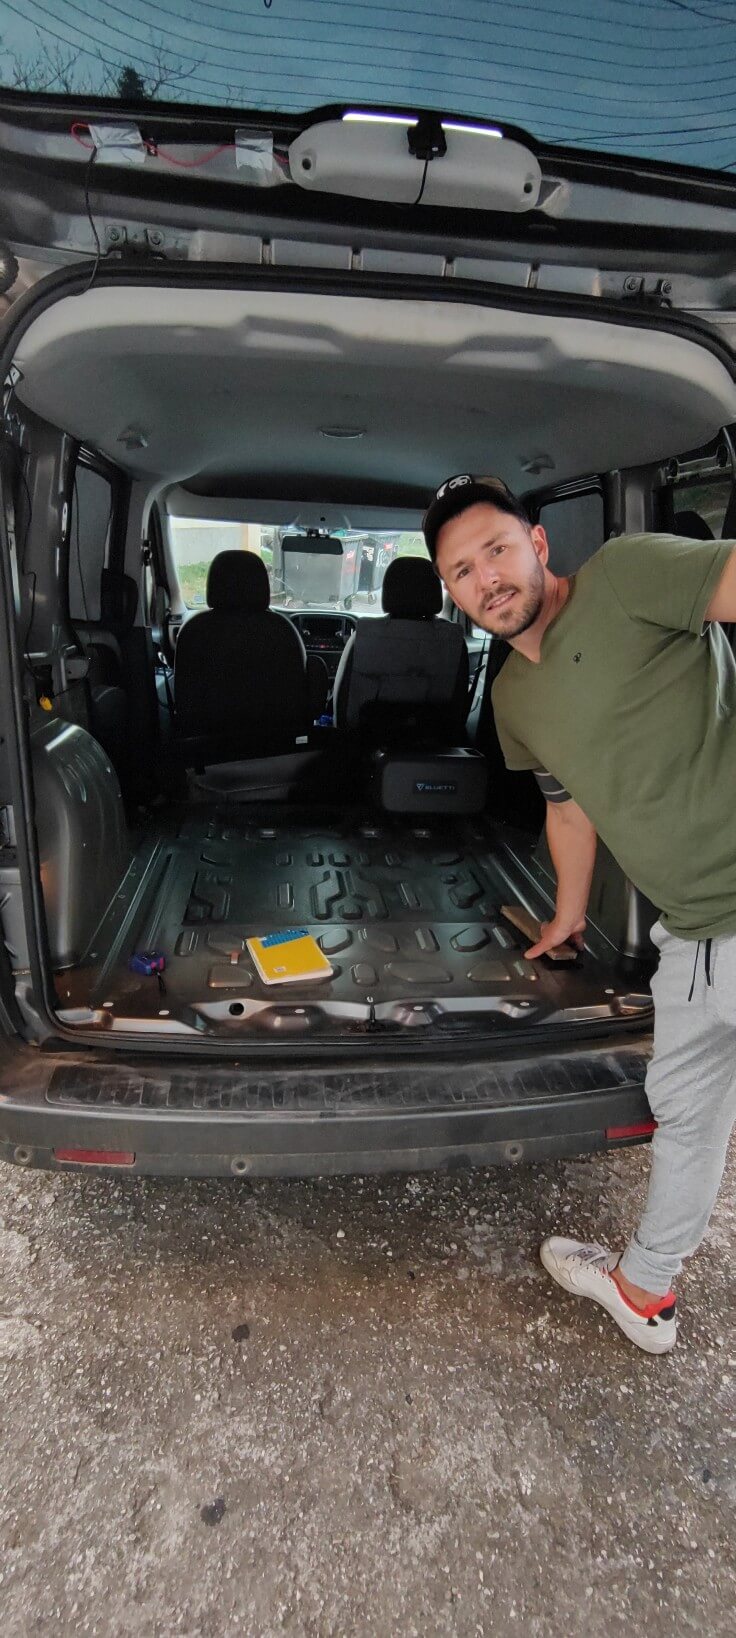
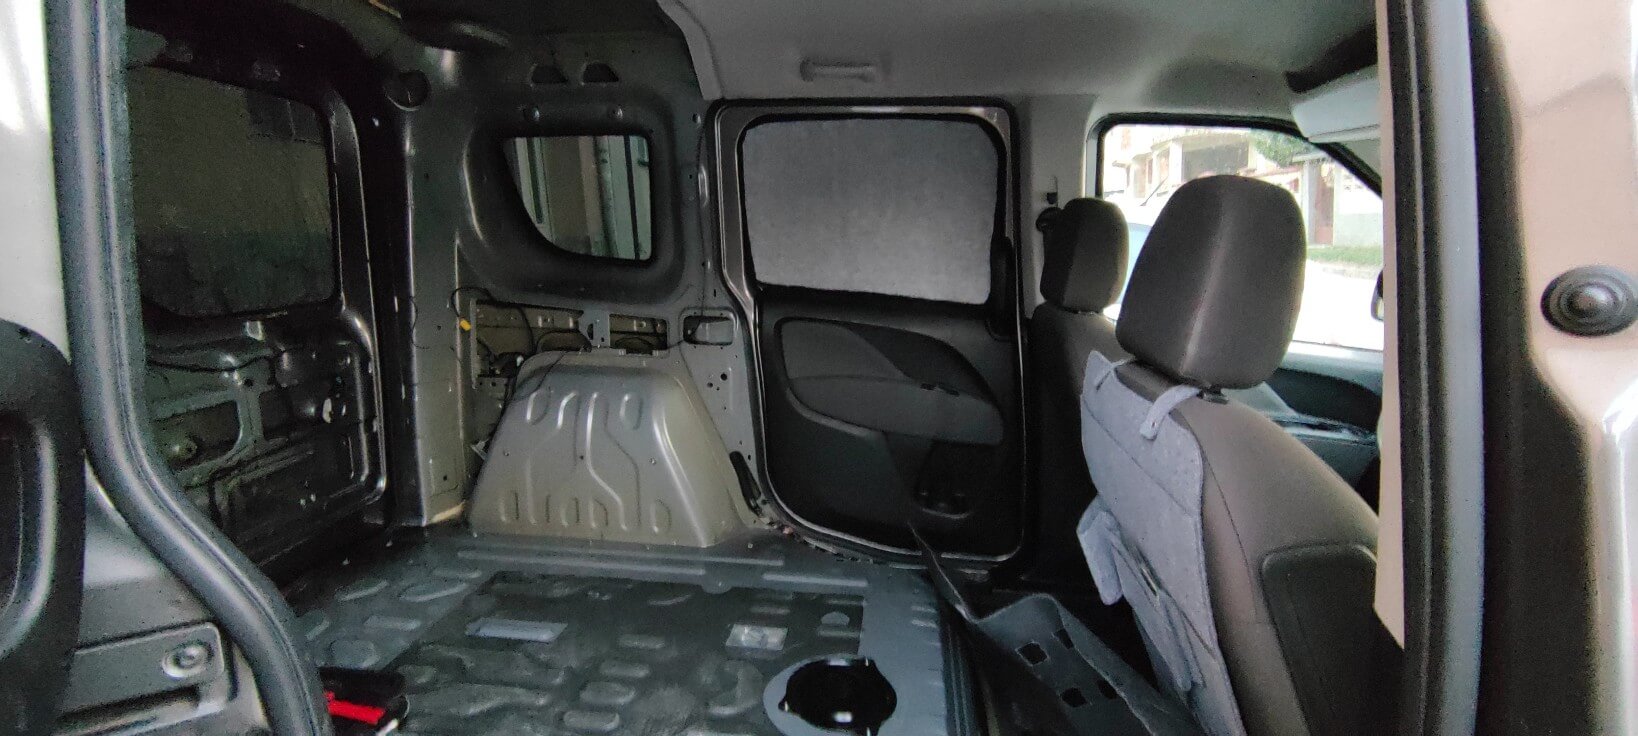
Arriving in Bulgaria, the van was completely “as is”. So I started by stripping it out of all its possessions behind the driver’s seat. the van I purchased was a passenger version, so that meant taking all the panels out, sats, flooring, ceiling, etc… everything out.
It required a lot of unscrewing and a lot of pulling out panels. But eventually, I managed to get everything out, and the space felt like it had doubled in size, leaving me with an amazing amount of room to work with.
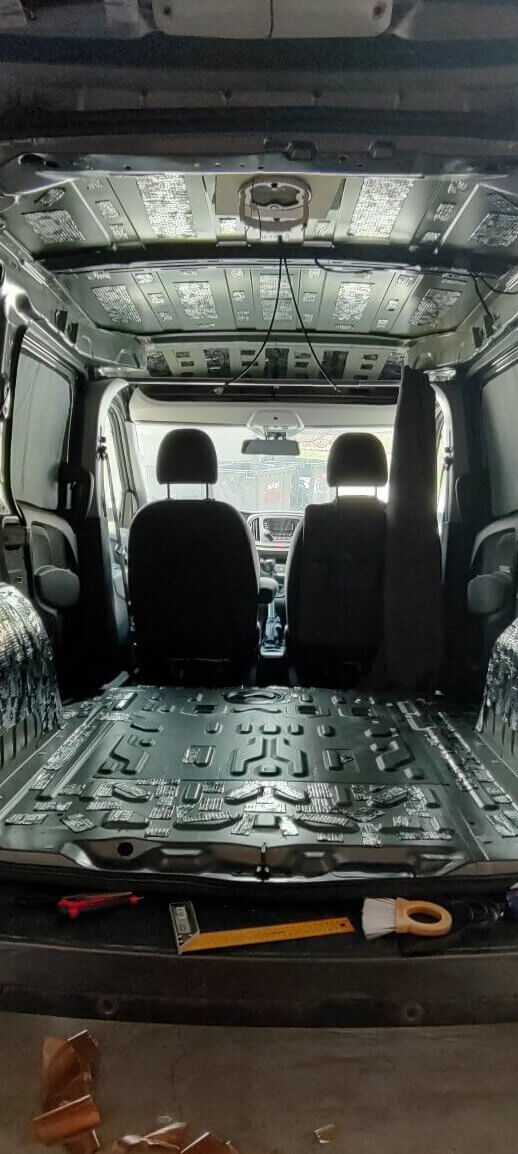
I then proceeded to install sound deadening around the areas which were susceptible to create noise, like around the Wheel arch, and on the roof and walls.
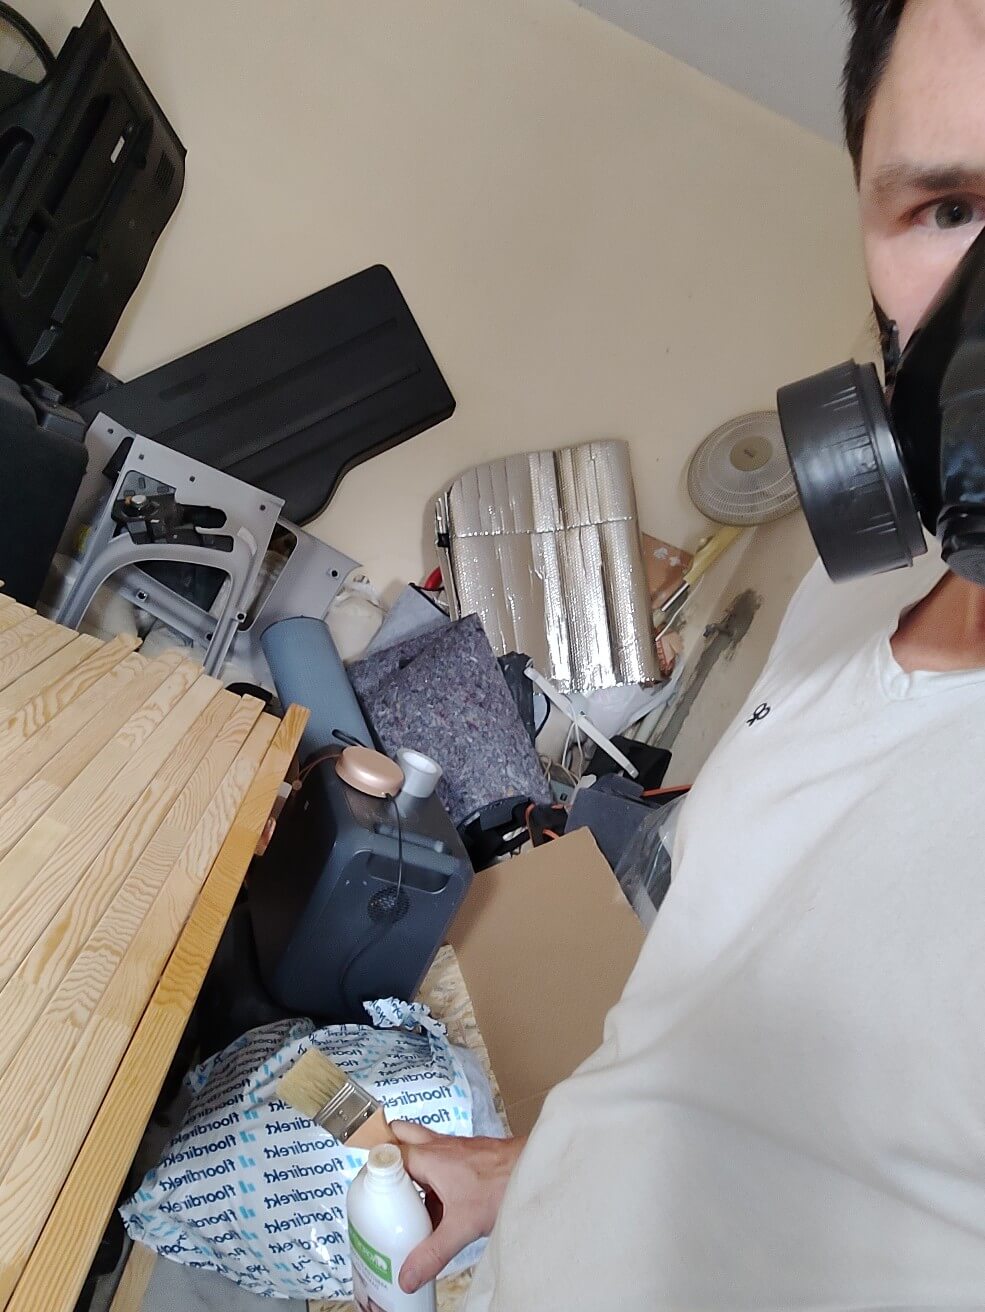
After that, it was time to insulate the van with a layer or two of Armaflex, which seems to be a great product mostly used in Europe, especially in German van builds. And since I purchased everything in Germany, I decided to do it “the local way”
Installing Exterior Necessities
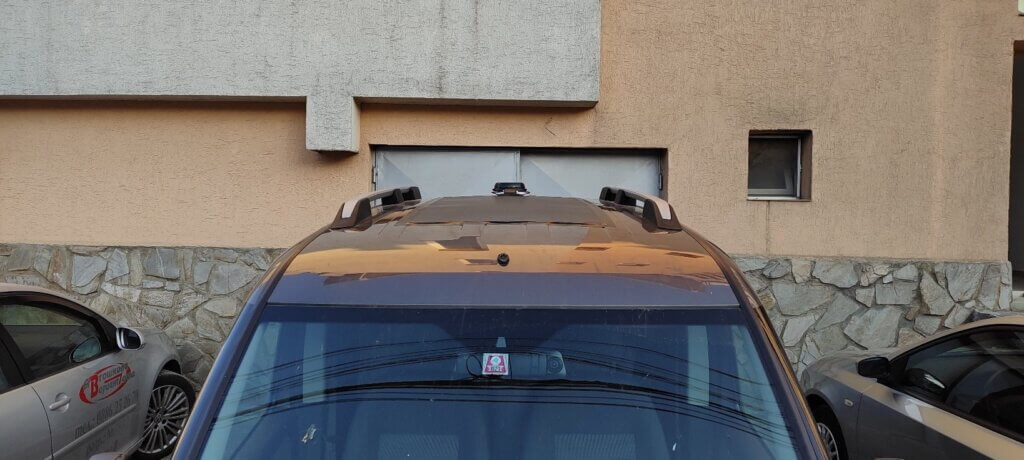
An important thing I needed to do was to install the Roof vent and the Solar Panels before I get any of the interior design started. The roof vent was an essential part of the airflow system I had designed for the van. Combined with a floor vent, it would let the cool air being sucked from the bottom, and expel the hot air through the roof through a top-of-the-line product called the “Maxxair dome” fan. It was a pretty costly fan, at around 160 euros, but comments online were swearing by its amazing capabilities. So there I went ahead and made a massive hole in the roof, a pretty stressful moment to be honest.
I then added my 180-watt flexible solar panel to the roof, which was the biggest panel I could find that would fit the roof of my Doblo. I also made sure it was as stealthy as possible, and black was the perfect choice to cover the roof and stay discrete.
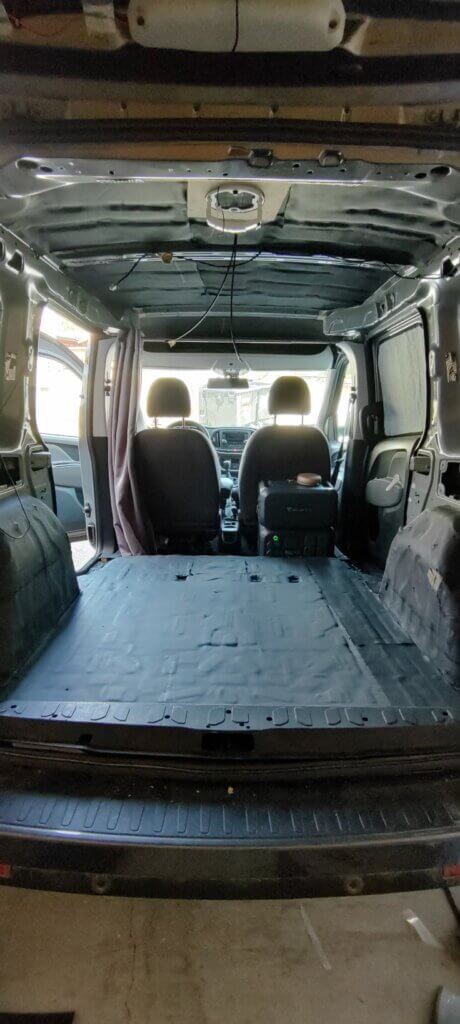
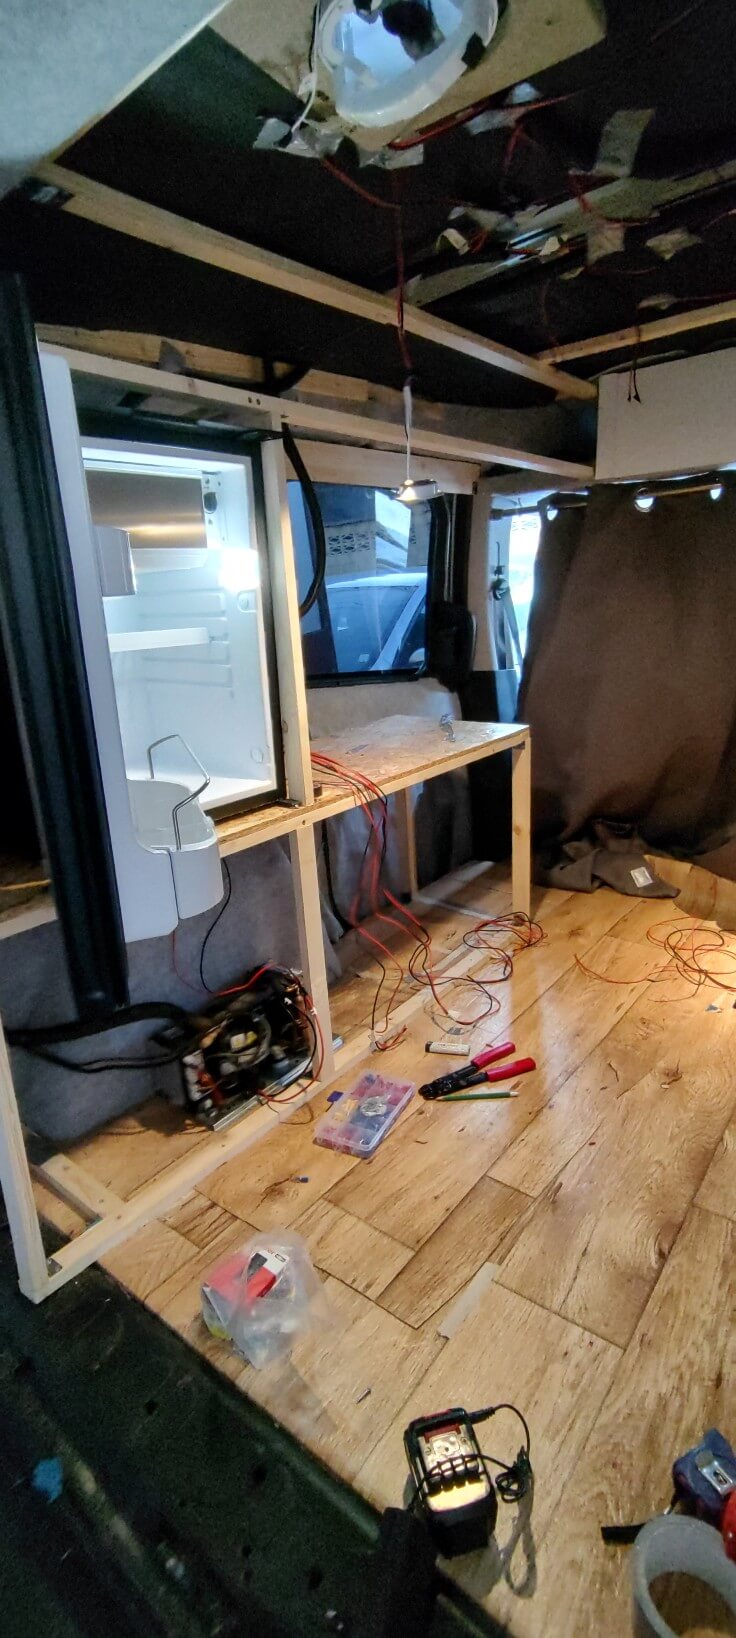
Installing the Van’s Floor
From there, I could create a nice floor, firstly by installing a Subfloor of plywood, as well as creating storage cabinets under the seats and feet area of the back passenger area. In a small van, every corner needs to be used and so I now enjoy a massive cabinet at the feet area to store stuff. I added strong hinges to support the door.

The final step for my floor was to add a nice covering, and so I went ahead and installed vinyl flooring with a wooden design for the visuals.
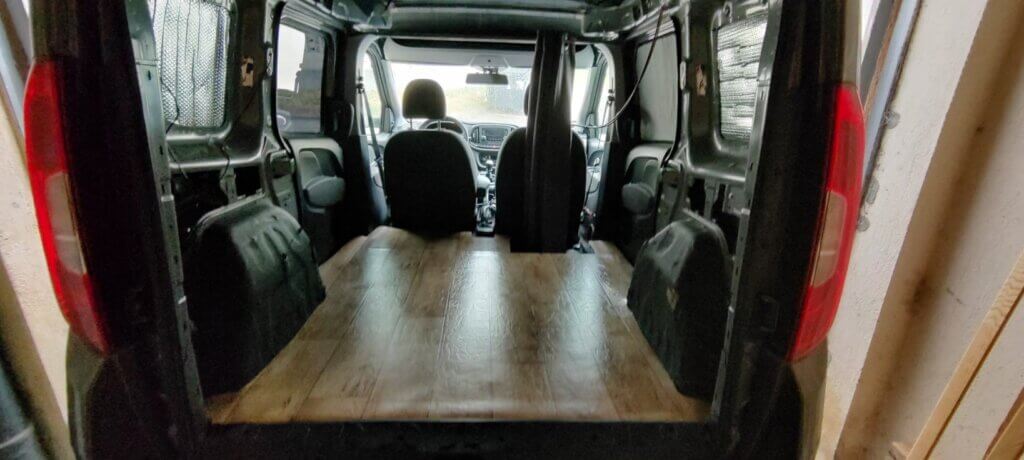
I also carpeted the visible areas with felt car-carpeting, to act as the back panel for the cabinets, and to make sure I use all available space in there (many vans use plywood between the wall and the back of the cabinet, losing precious space.
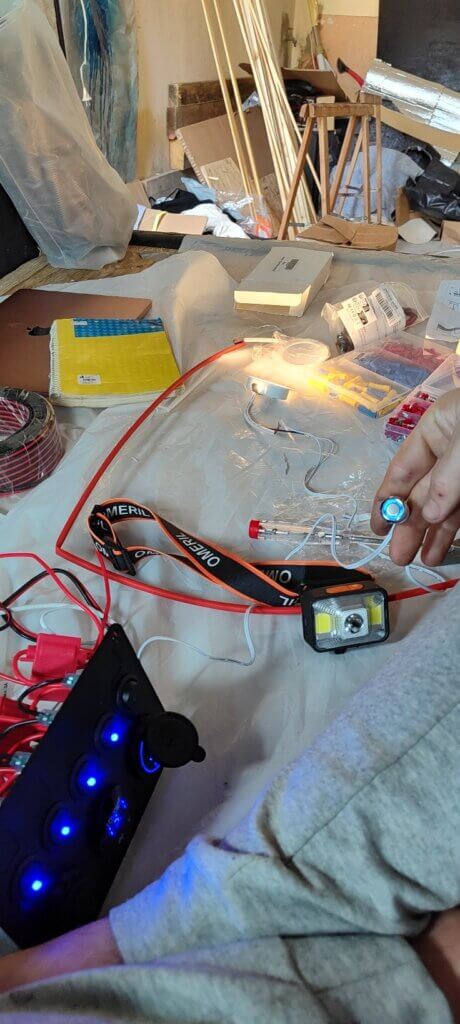
The Electrics
The electric system connected to a leisure battery in a van is what makes it a home, having the ability to plug in house-style attributes and appliances such as lights, water pumps, AC and DC sockets, a stove, a fridge, etc. For my build, I wanted to have a fully electric system, which means, no gas. Many people chose to have LPG gas systems in their vans, and I have nothing against it. But in such a tiny space, having a whole area to house a refillable Gas tank that is big enough to give independence off-grid (having 11kg was my alternative design) was just not an option.
With recent technological advances in Lithium Battery Power banks from companies such as Jackery, Bluetti, Ecoflow, and Anker (just a name a few), I carefully calculated that by having around 300 to 400 Amps of battery, we could run everything electric. This means cooking facilities, such as an induction cooker, a fridge, etc… I opted for a Bluetti AC200Max, which provides 2048 Watts of battery storage, with an additional 2048 watts of extension battery. The full package would stack up perfectly in the foot area of the back seats and would fit under the bed. Some might argue that this is definitely an overkill of energy as most vans going for lithium chose to have around 1000 watts of lithium battery. Buy by having 4x more than the average, we can have the peace of mind of spending long periods of time off-grid, and recharging our batteries with solar power and through the alternator of the vehicle.
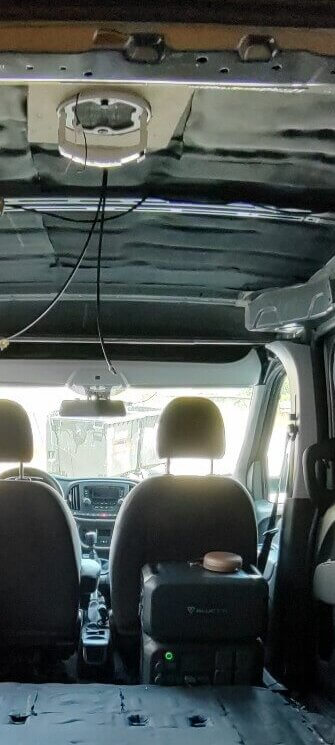
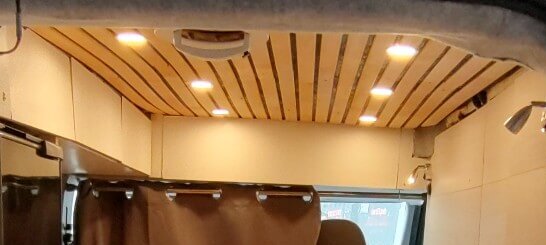
I then proceeded with arranging the electrical appliances and wired everything around the van through corrugated pipes passing through the roof. I first tested that everything was in good condition before starting to put it in place. I chose to have a system of 6 main puck lights on the ceiling, connected to a Dimmable switch, and another set of 2 lights for the kitchen area. this would produce enough light to have a comfortable place to live inside, whether it be by day or night. I also added 2 rotation reading lights at both ends of the wall.
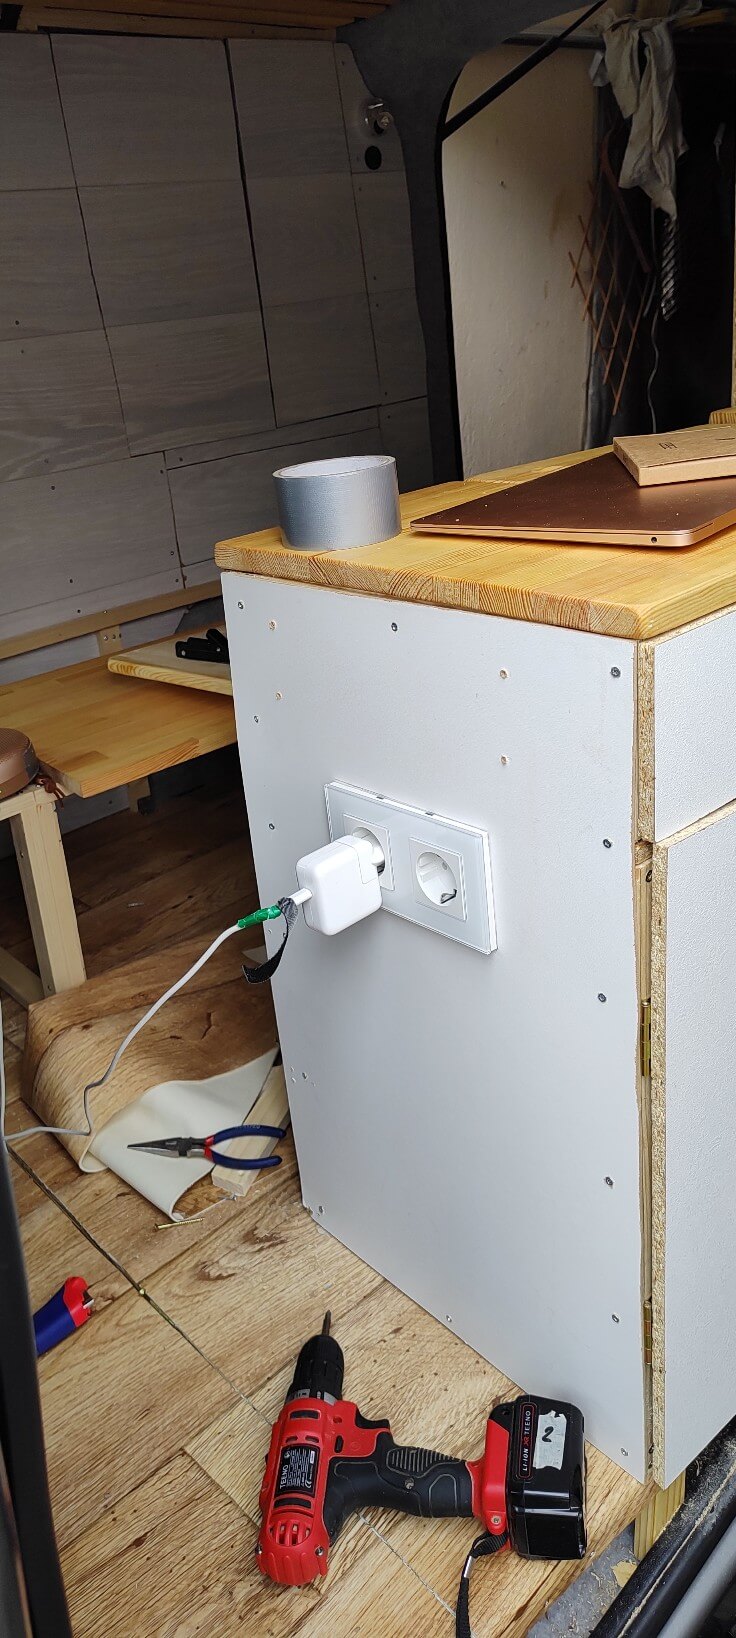
The electrical system is also designed to take advantage of rechargeable devices. So I first set up as many USB plugs as possible around the van (we have a total of 12 USB plugs) and I bought devices that can easily run on their own batteries (for example, the blender is wireless and has its own lithium battery that I can recharge whenever there is plenty of juice coming in from the sun. the same applies to the Fan, torch, headlamp, oil diffuser, etc…)
I also opted to hide as much as possible any lighting that could be seen at night and create unwanted light, s I opted for USB switches that can be turned off as well as installed the control panel inside a cupboard.
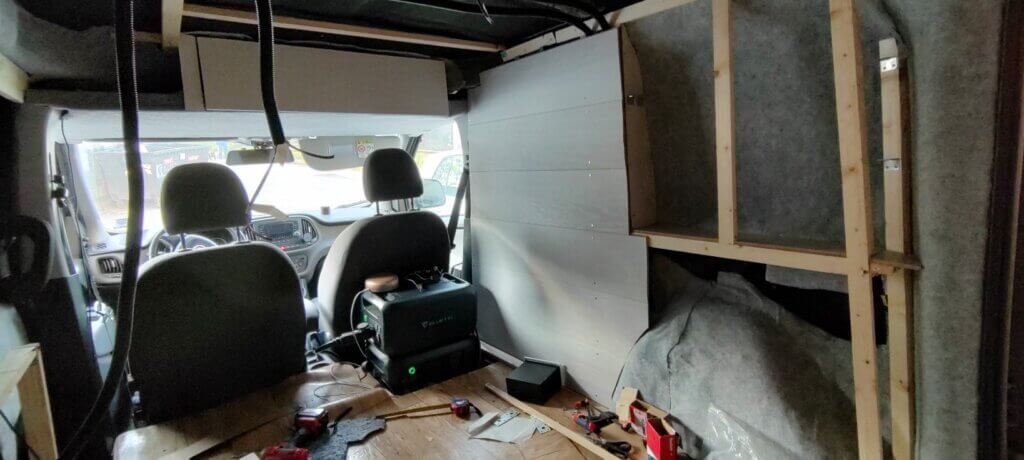
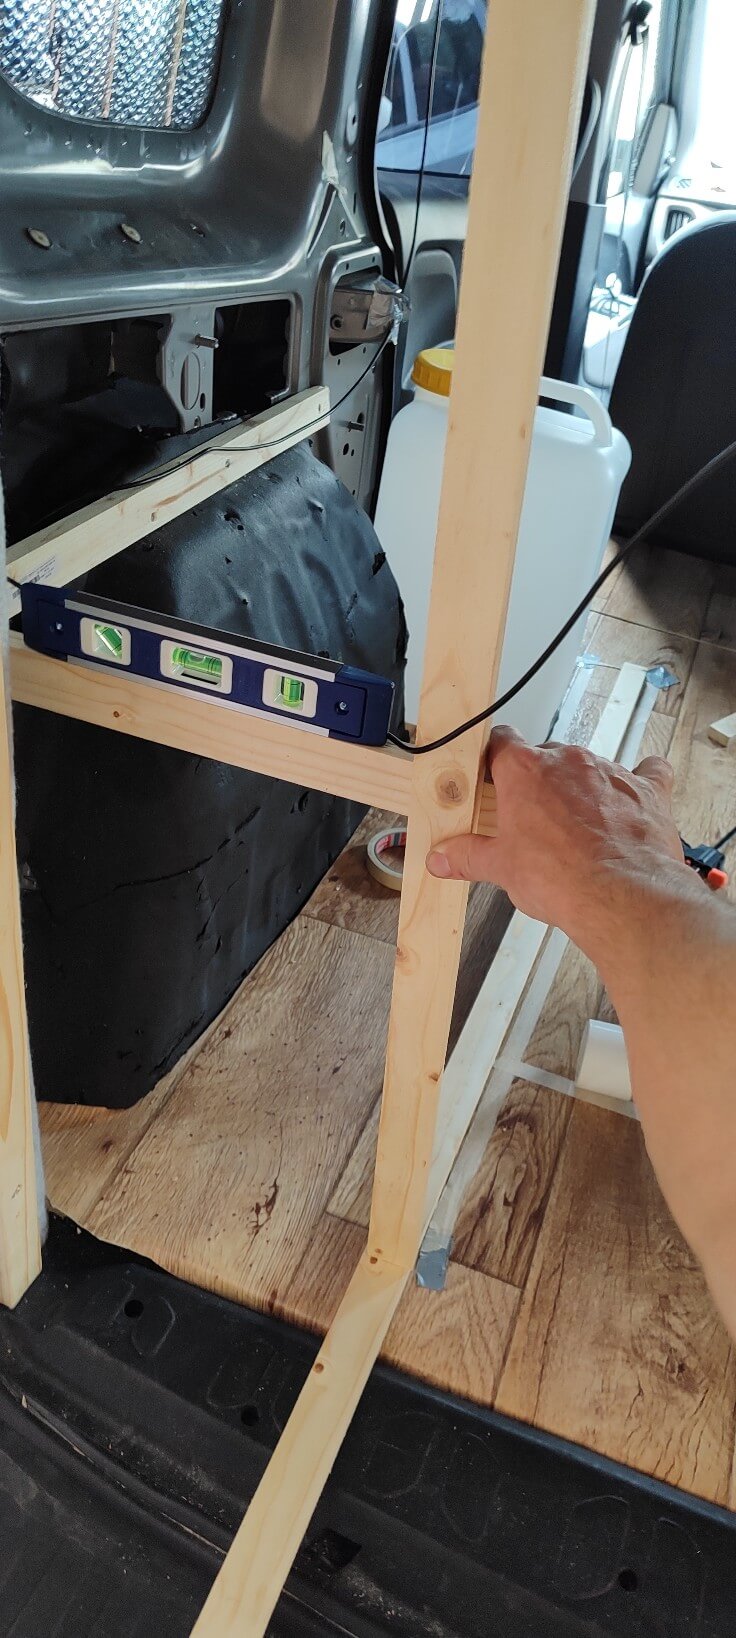
Building the Wall
In the design that I chose, I really insisted on having one of the sliding doors blocked completely to give me a Garage space and have a long wall that would cross the van and make it more square and eliminate a bit of the curves that make up a van. The garage would help me store all the building tools and products that I wouldn’t want to have in my living area, and keep everything organized. I also built the wall to house cupboards to use every bit of space available, as well as hide the wheel arch.
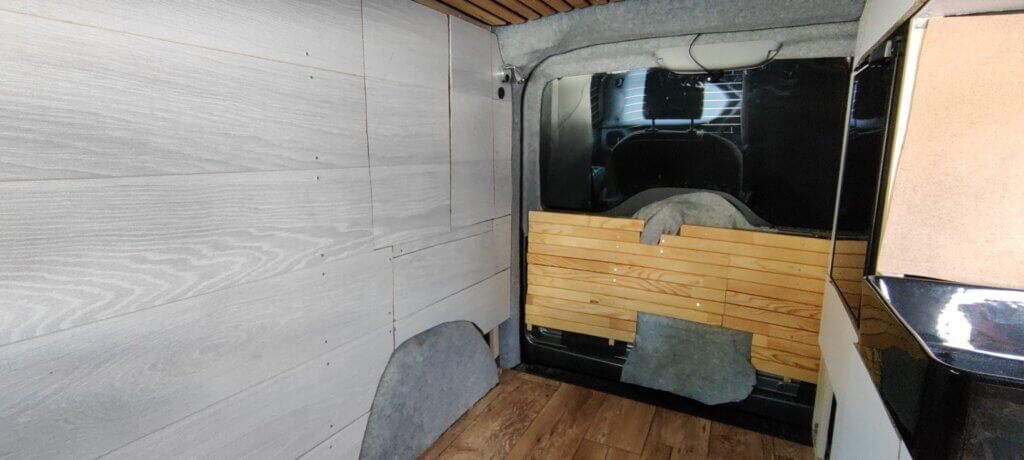
since I was lacking building materials in Bulgaria, I opted to use flooring planks to build the wall, which gave it a nice finish and a solid structure, while keeping the weight on the lower level. I reinforced the panels around the cupboard over the wheel, to give it more thickness to install some nice hidden cabinet hinges.
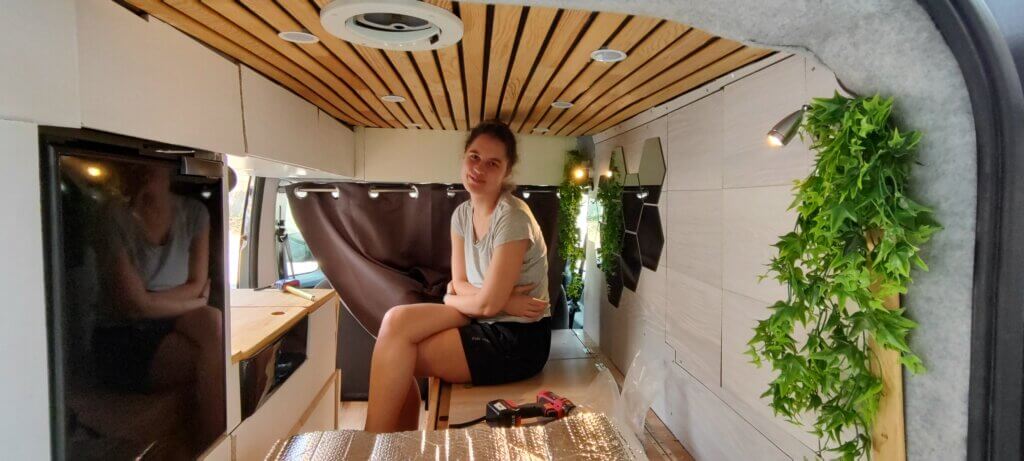
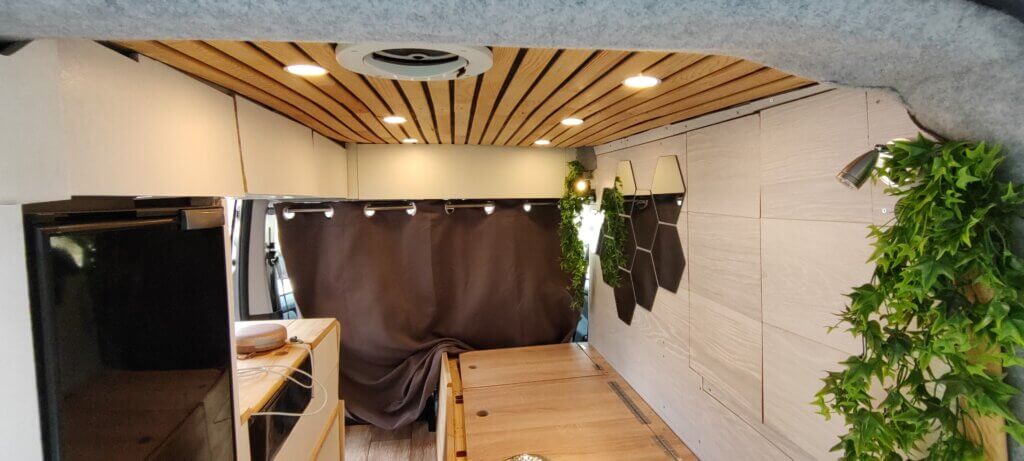
Building the Ceiling
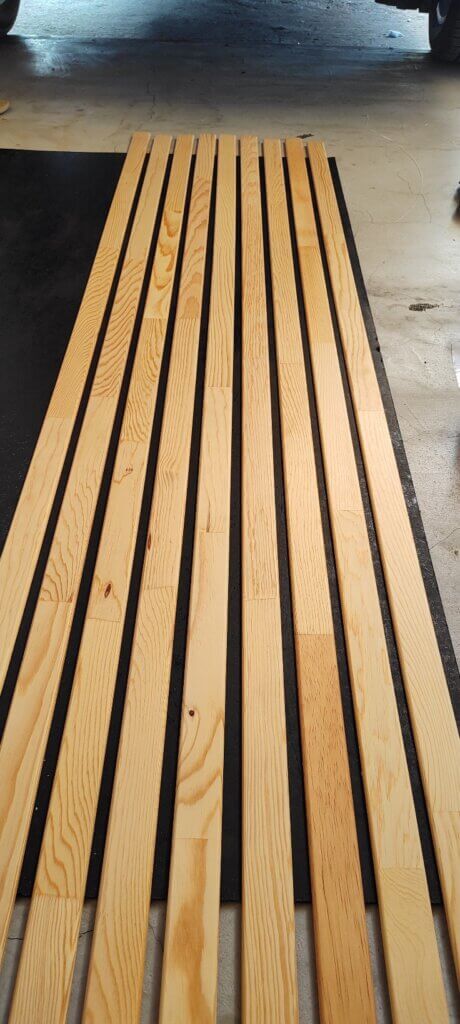
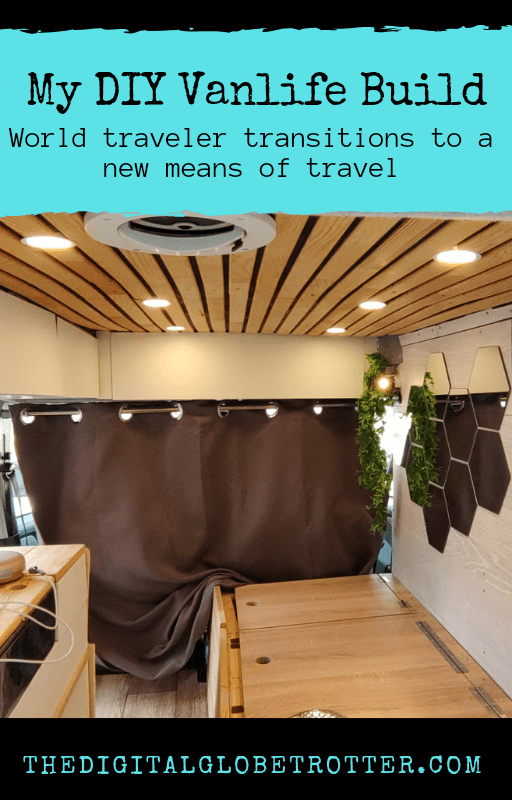
Even though I was a little rushed in time to make the build in only 28 days, the ceiling was a part of the job that I insisted on putting a little more effort. I wanted a beautiful ceiling with nicely treated planks of wood, which required a little carpentry knowledge. After researching the subject, I studied several designs and decided on one that is a little longer to get done, but would make a big difference in the aesthetics of the van. For this, I would need a plywood panel painted in black, and thin planks of quality pine wood, carefully sanded and finished with several layers of Danish oil. the Danish oil helped bring the grain of the wood into perspective, while leaving a nice natural color. I left a small space of 1 cm between each lat, to make this beautiful effect on it, and glued them into place. It took me several days just to apply and sand the lats, but the results were much better than I could have thought
I also used the leftover lats to build around the back door to give a more homey look over the metal. I used carpet around to cover up the back-wiper engine, as well as any piece of metal that could still be seen.
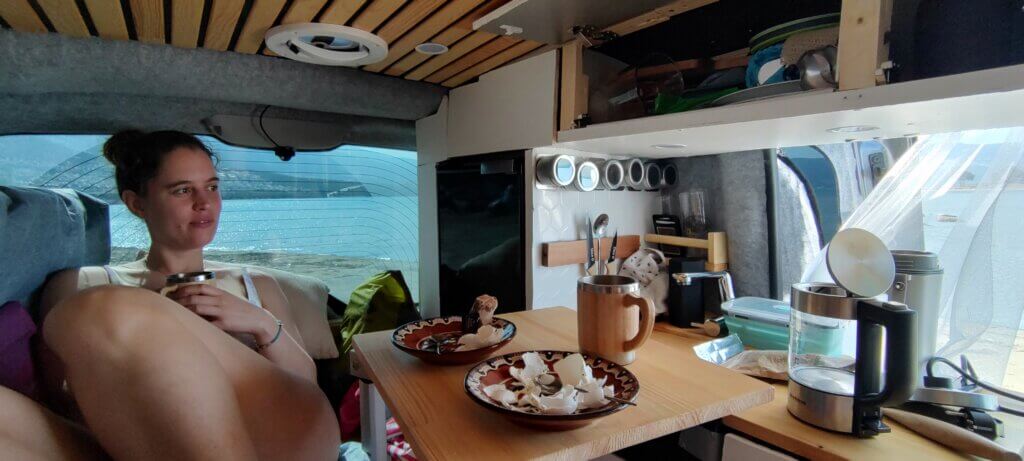
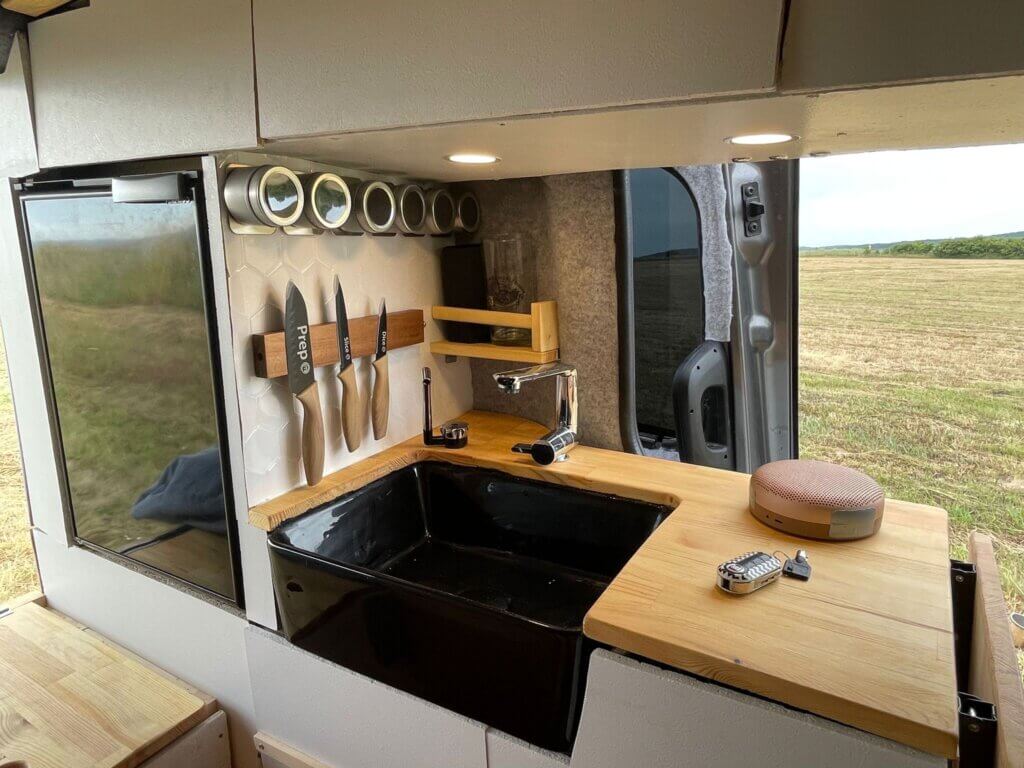
The Kitchen Cabinets
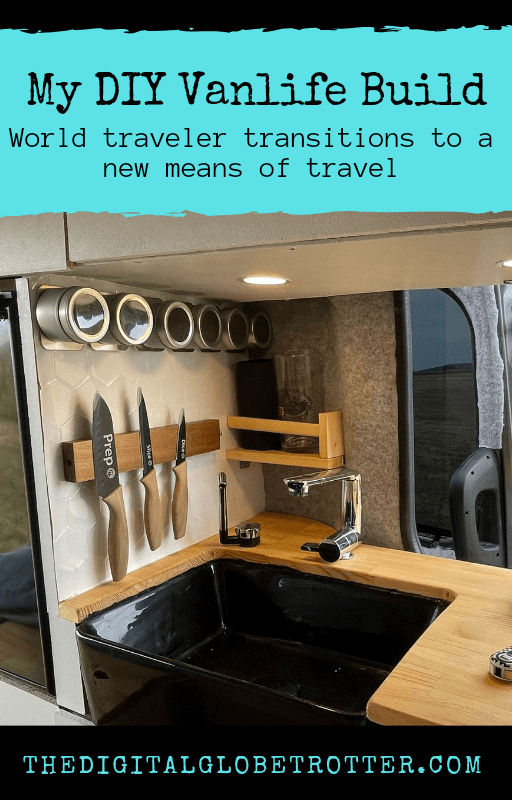
This section of the build was probably the most carefully planned and difficult to accomplish. For everything to fit nicely, I had to choose all appliances to have the correct measurements, not to excede 40cm in length. I chose a Fridge that had an external compressor, so I could install it in this very limited space. I also chose carefully the water tanks to be able to have as much water as possible to have as much water independence as needed, in all the limited space. I went ahead with 2 tanks of 20 liters, one for drinking water, and one for rinse water. Additionally, I installed a tank of wastewater for the sink.
The sink was another piece of the van that I wanted to splurge on. I wanted to pull off the “Belfast style” kitchen sink, which extends a ceramic sink through a butcher board, creating a really stylish effect. The colors of the interior design were meant to be white, Cream, and Wood. Only the Fridge and the sink were meant to be Black, to give a more refined contrast.
The sink is accompanied by two taps that have their own water pump, in each tanks, for drinking and rinsing.
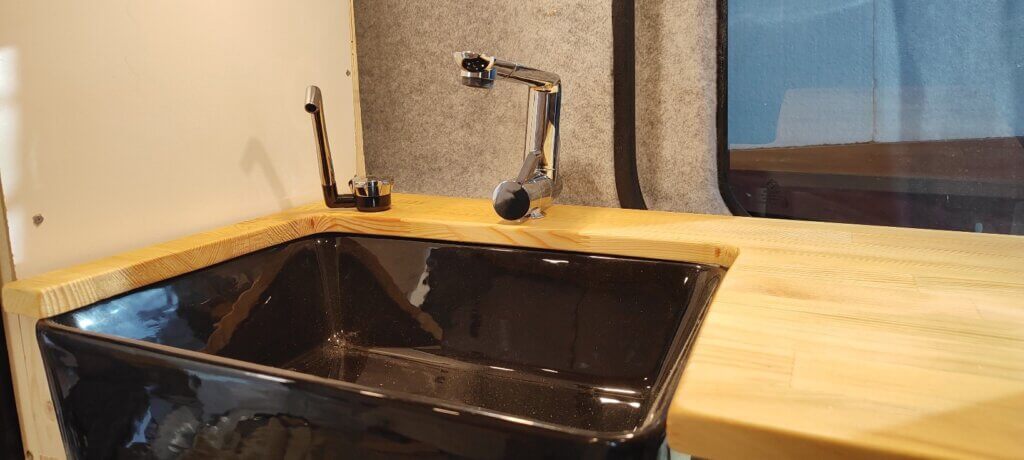
For the butcher top, I carefully finished a large piece of pine wood with Danish oil, and cut it to have the sink fit into place, with just a 2cm extension coming out, to produce this Belfast sink effect. I added a foldable extension to the butcher board that opens across the sliding door that would let us cook with the door open with an induction cooker.
The overall result of the kitchen is definitely exceding what I had expected, and I am really happy with the result.
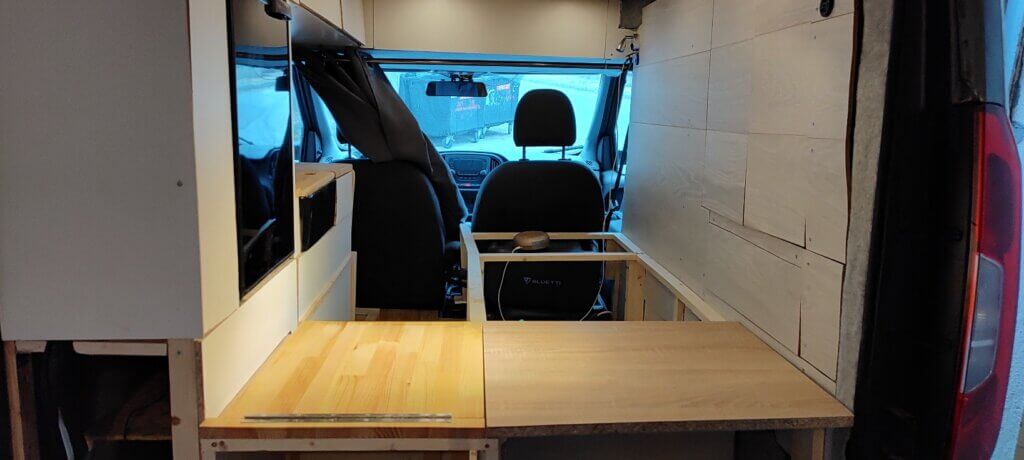
The Bed and bathroom
The bed system I designed was influenced by other builds, but I decided to test a totally new system that would use two pieces of butcher board in a multi-function system. The board would be part of the bed, as well as our working and dining tables. The butcher boards had to be able to fold back and attach themselves to the bed structure with magnets to hide out the luggage compartment as a small wall. I used a popular table leg that is used primarily in yachts, the Lagun table, and purchased an extra table mount so we could have 2 different table sizes, one of 75cm long, the other by 45 (both 40cm wide). I must admit i wasn’t sure I could pull this off, but the result was amazing!
I also included a camping toilet on the left side and found a cassette toilet that would fit precisely in the space (almost to the millimetre), while being able to service it from the back. The toilet cover is a piece of Butcher board finished with Danish oil, and lifts with the help of a hinge and held by a Gas-strut. Is it comfortable, you may ask? Yep, so far so good! Does it smell? Hardly, if used wisely!
The center cabinet of the bed is designed to house 2 Carry-on luggage (for me and my girlfriend) so we can easily take them out qt will and board any flight to continue our adventures in anywhere in the world when needed. The back area on the right is a storage area with basket for easy access and temporary things, like putting purchases from the supermarket.
Final Result
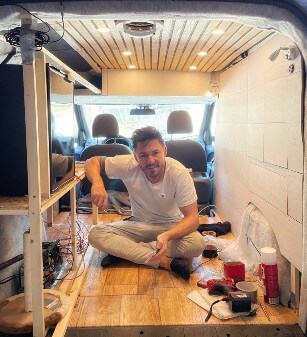
I managed to finish the van on the exact day we were meant to leave, almost to the hour… The amount of work it took was non-negligible, having worked between 12 and 15 hours every single day for 28 days. I ended up with tendinitis in both hands, and muscle ache in every single musle in the body (along with dozens of “still to heal” cuts on both hands). And on the last day, I finally cleaned up the garage and set off on the road to southern Bulgaria where the first adventures would take us. We enjoyed our first night on the edge of a cliff overlooking the black sea on the most peaceful night I experienced in a long time. This first night of Vanlife and the feeling of accomplishment was undiscribable inside me, filled with pride to be able to finally experience this new tool I had built with my bare hands!
Of course, there were still a few things to finish in the van, like making cushions for the bed (we only had a cut mattress by then), as well as a few additions we would put later, like installing a diesel heater and installing a more powerful Dc to Dc charger from the car’s inverter to charge our batteries. But living in a DIY van is always like this, there will always be things to build and add along the way, as we experience it more and find its flaws. But for now, we are already living part-time in the van and are really pleased with it!
If I had to recommend living in a small van like this to anyone wishing to experience van life, I would say to proceed with caution. For me, this is a perfect size, as we don’t want to live full time in it, but rather have the ability to reach all corners of Europe, sleep in the forest or by a beach if we want to, and mix it with sleeping in beautiful Airbnb and hotels that can be hard to reach otherwise. I am a minimalist by heart, and have spent most of my life living in a carry-on luggage. So definitely, adapting to a small space was easy. For others, more space will be needed I guess. But if in doubt, go ahead and try it, you can always upgrade in the future! The important thing is to go ahead and pull the trigger, and start the adventures as soon as possible.
Other Pictures of the Van Build


Pin to Pinterest
Support Ian with a TIP or Donation
Like what I do? Tips and donations like yours are what keeps this site alive. Its simple and quick, and makes a big difference.Offer me a Coffee !
Why not take 30 seconds to offer me a coffee and show your appreciation. A small gesture that goes a long way!Crypto Donations
BTC: bc1qwjy4s7t399jztr7ypnzlwlkd5d4wamnsz3582d
ETH: 0x4C1Ad7546f8a8e17FDD667f3fc837632Dff5bA85
LTC: ltc1qw2gfkuegaun8u5gzv0ua070n5pu3zak9je3tul